
31/5 /26 - Playing with the Playful Packaging stamps & dies.
- Alison Culliver
- May 31
- 12 min read

This fun bundle could just be the answer to all of your packaging & gifting needs.
Hello & welcome to my blog. I hope you are all well.
My name is Alison & I live in beautiful Melbourne, Australia & I am an independent Stampin' Up® demonstrator.
I love to create beautiful things to share with people that I love but I also sell me creations. I have been creating things in one way or another for most of my life - knitting, sewing, cooking, card making, gardening, scrap booking & hand made gifts & in 2020 after joining Stampin' Up® I decided to share my passion in a blog (craftedbyalison@blogspot.com).
In 2025 I retired & decided to spread my creative wings a little more by combining my blog, products that I had been selling on FaceBook & launching a newsletter. Some of these things I had already been doing but this time they are all in the one place. (All previous posts can be found at my blogspot address above if you would to read any of them.)
And here we are at my new site!
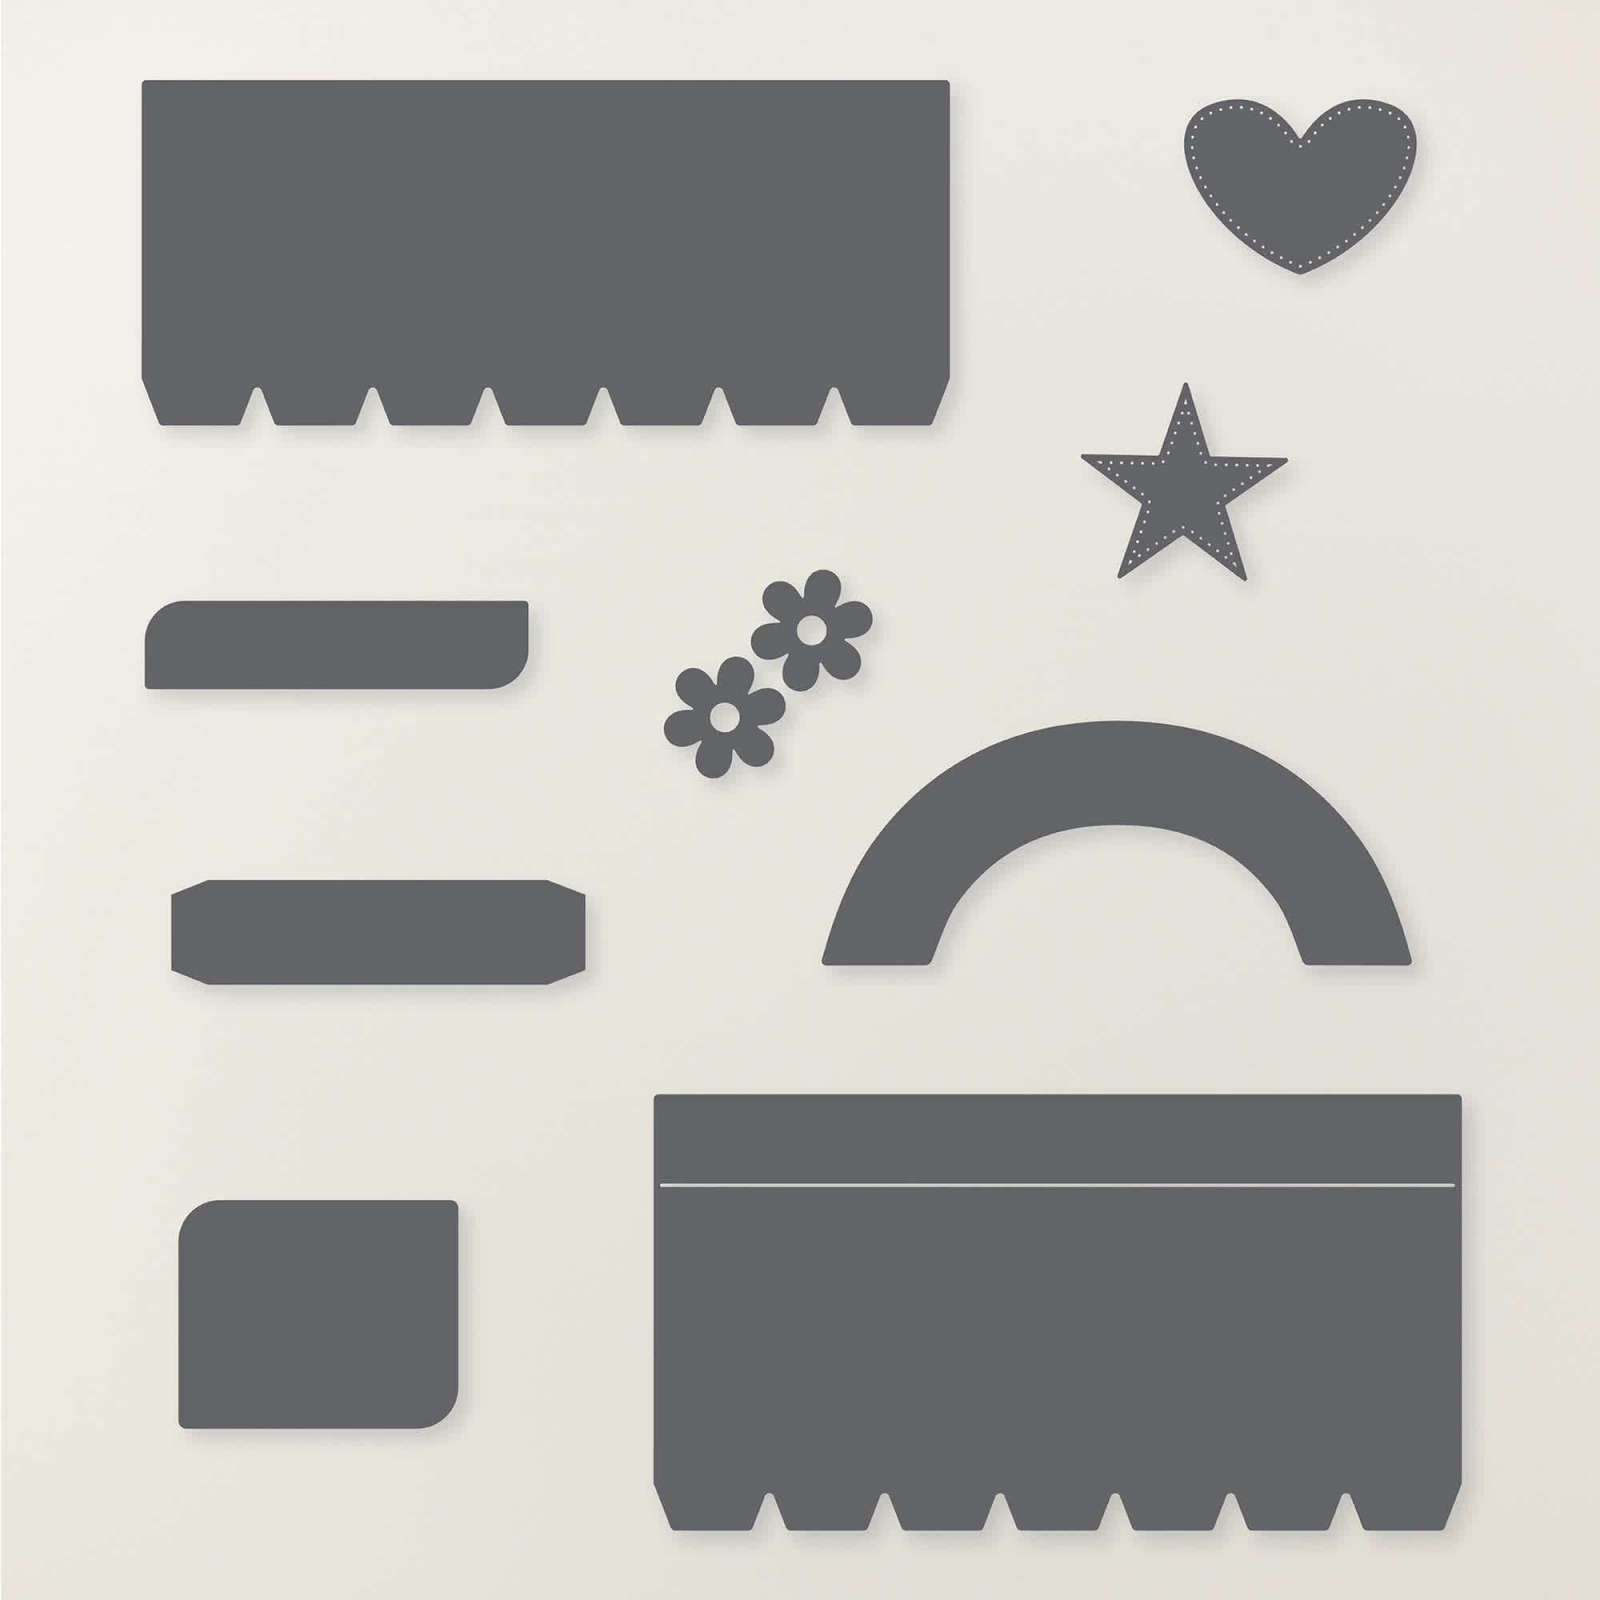
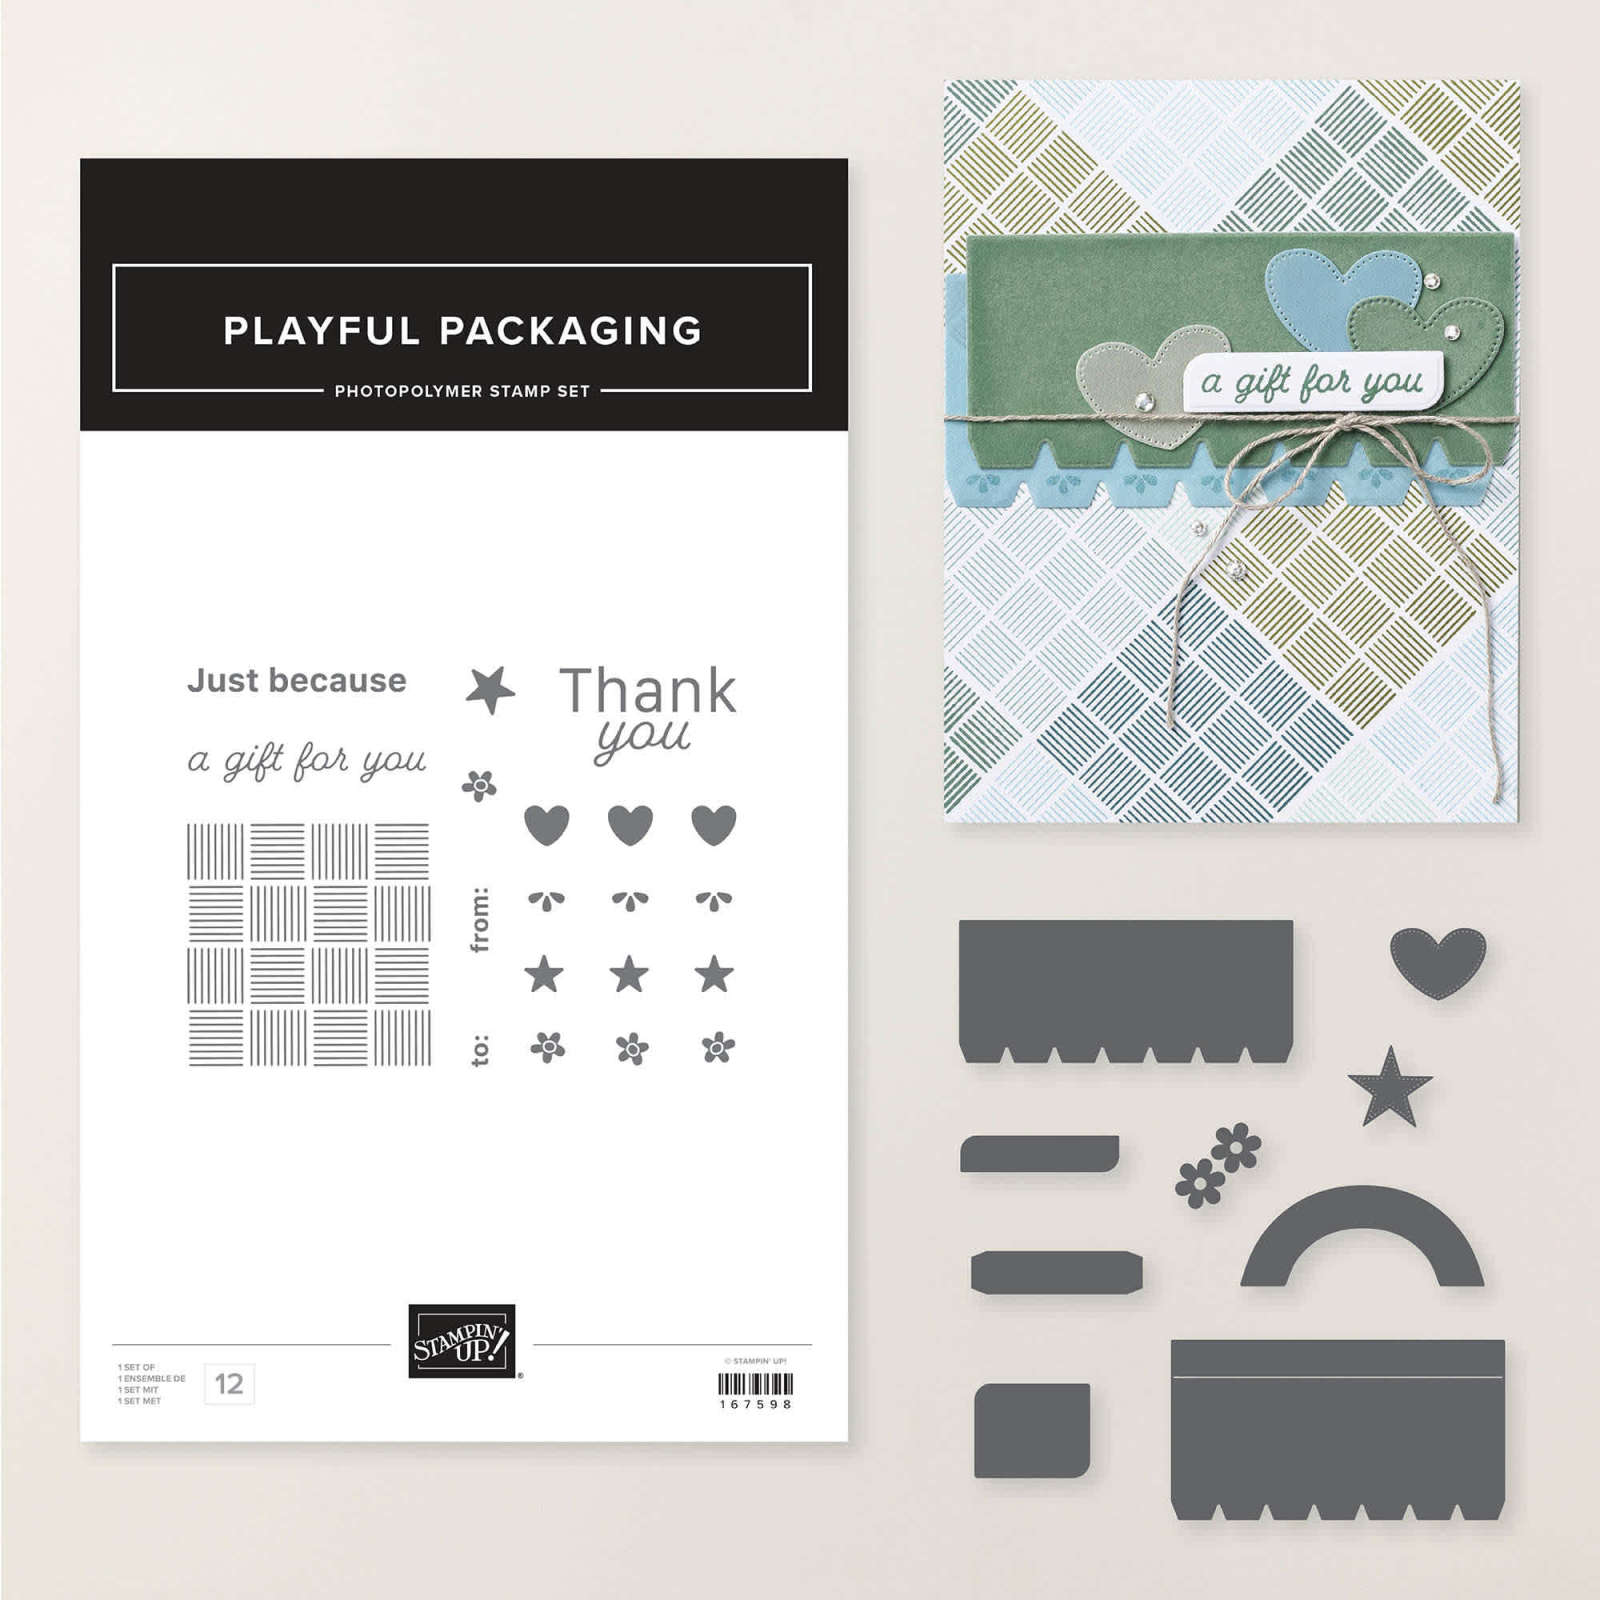
Today I am sharing two ways to use the Playful Packaging stamps & dies bundle to help you with your gifting & packaging options. Both of these projects are quite simple to make but there are a few steps so I have included a few extra pictures to help you. I am a visual learner so pictures help me a lot!
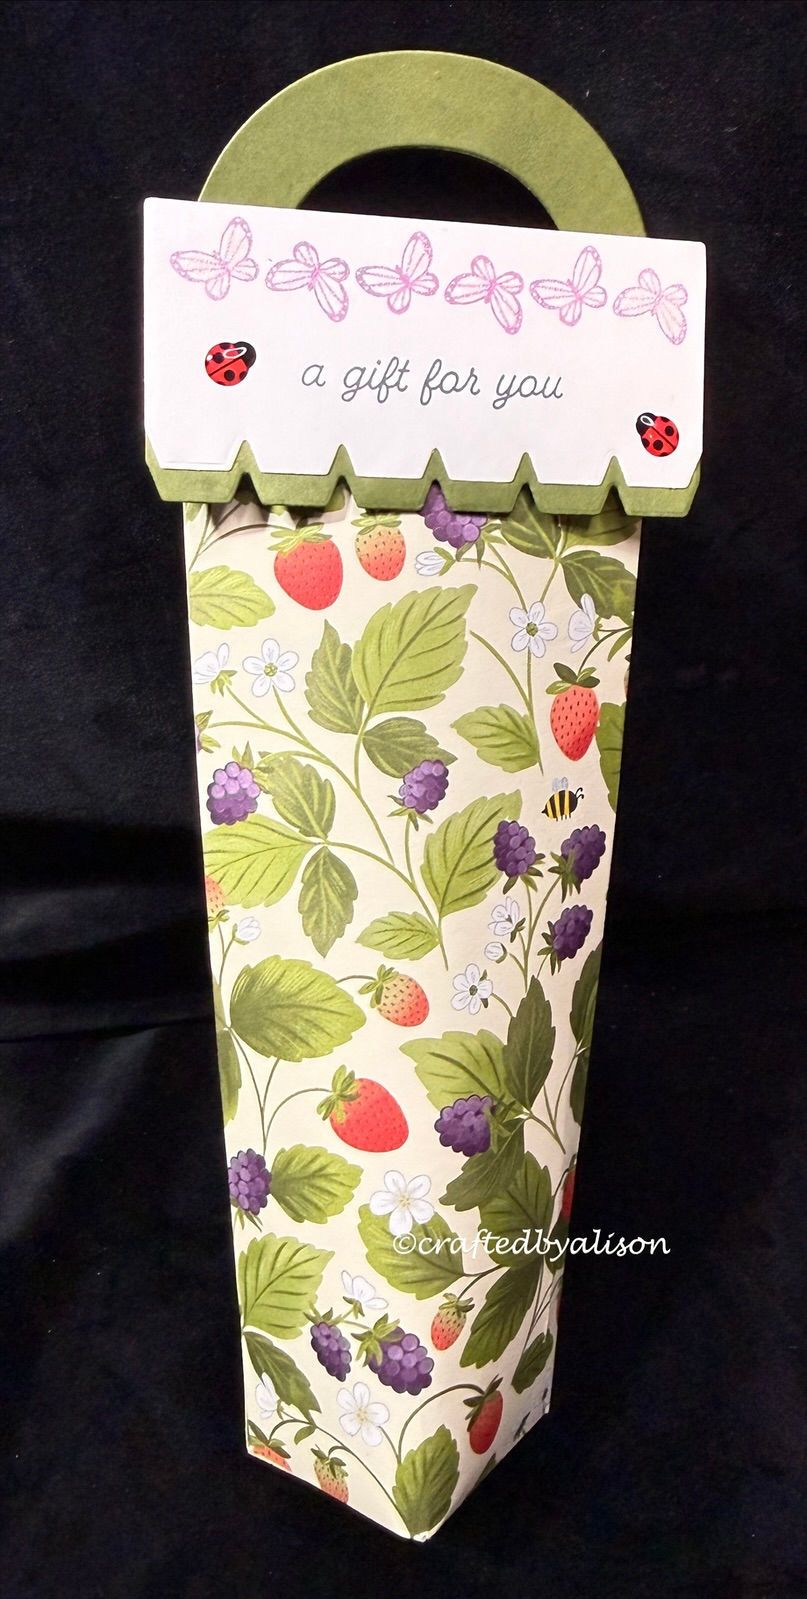
My first two creations (coz there will certainly be more to come!) are a matchbox style gift box & a gift tube, suitable for some hand cream or a pen. I chose to make these two projects as there are lots of projects on the socials that show clear cellophane bags with the label topper and I wanted to show another way to use this lovely & versatile bundle.

I will walk you through step by step on how they were created.
First off is the gift tube.
I started with a piece of Cute as a Bug DSP measuring 10 1/4" x 6 1/2". Next was the score lines - only a few but because there are some that only go part way & there is also turning of the DSP I have taken a picture of the cutting & scoring template to help.

SCORING
Score at 1/2" on the left side of the long edge. Turn clockwise.
Score at 1 1/2" on the short side. Turn clockwise.
Score at 1 1/2", 3", 4 1/2" & 6" on the long side down to the previous score line. This will give you the score lines at the bottom of the pictures above & below.

CUTTING
Trim off the small 1 /2" x 1/2" wedge at the left & include a small wedge above it.
Cut up to the 1 1'2" horizontal score line on all the remaining 3 scored lines.
Trim a small wedge off each side of tabs 1, 3 & 4 as shown in template. The second tab will be the bottom of the tube so doesn't need to be trimmed.
Make a small mark 1" down & 3 1/2" across from the left side. Trim off this section.
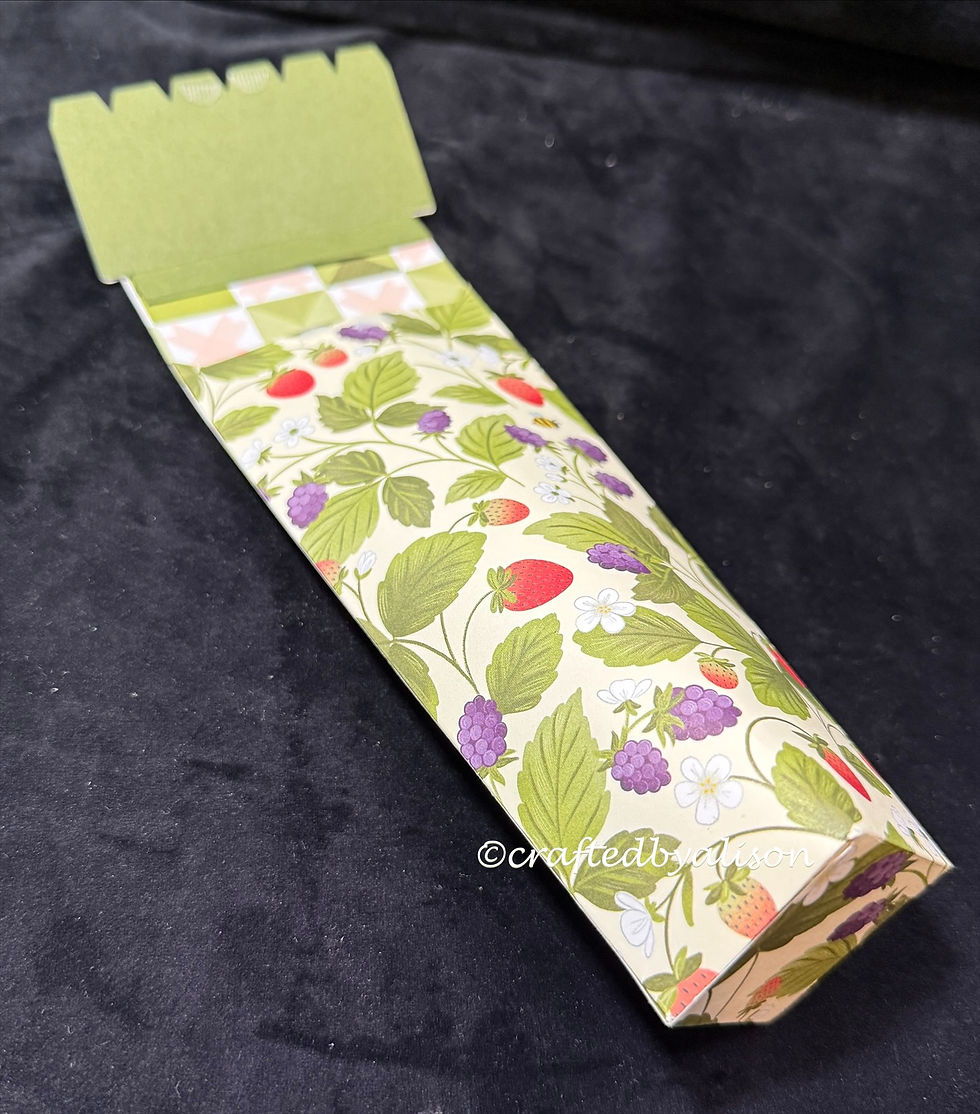
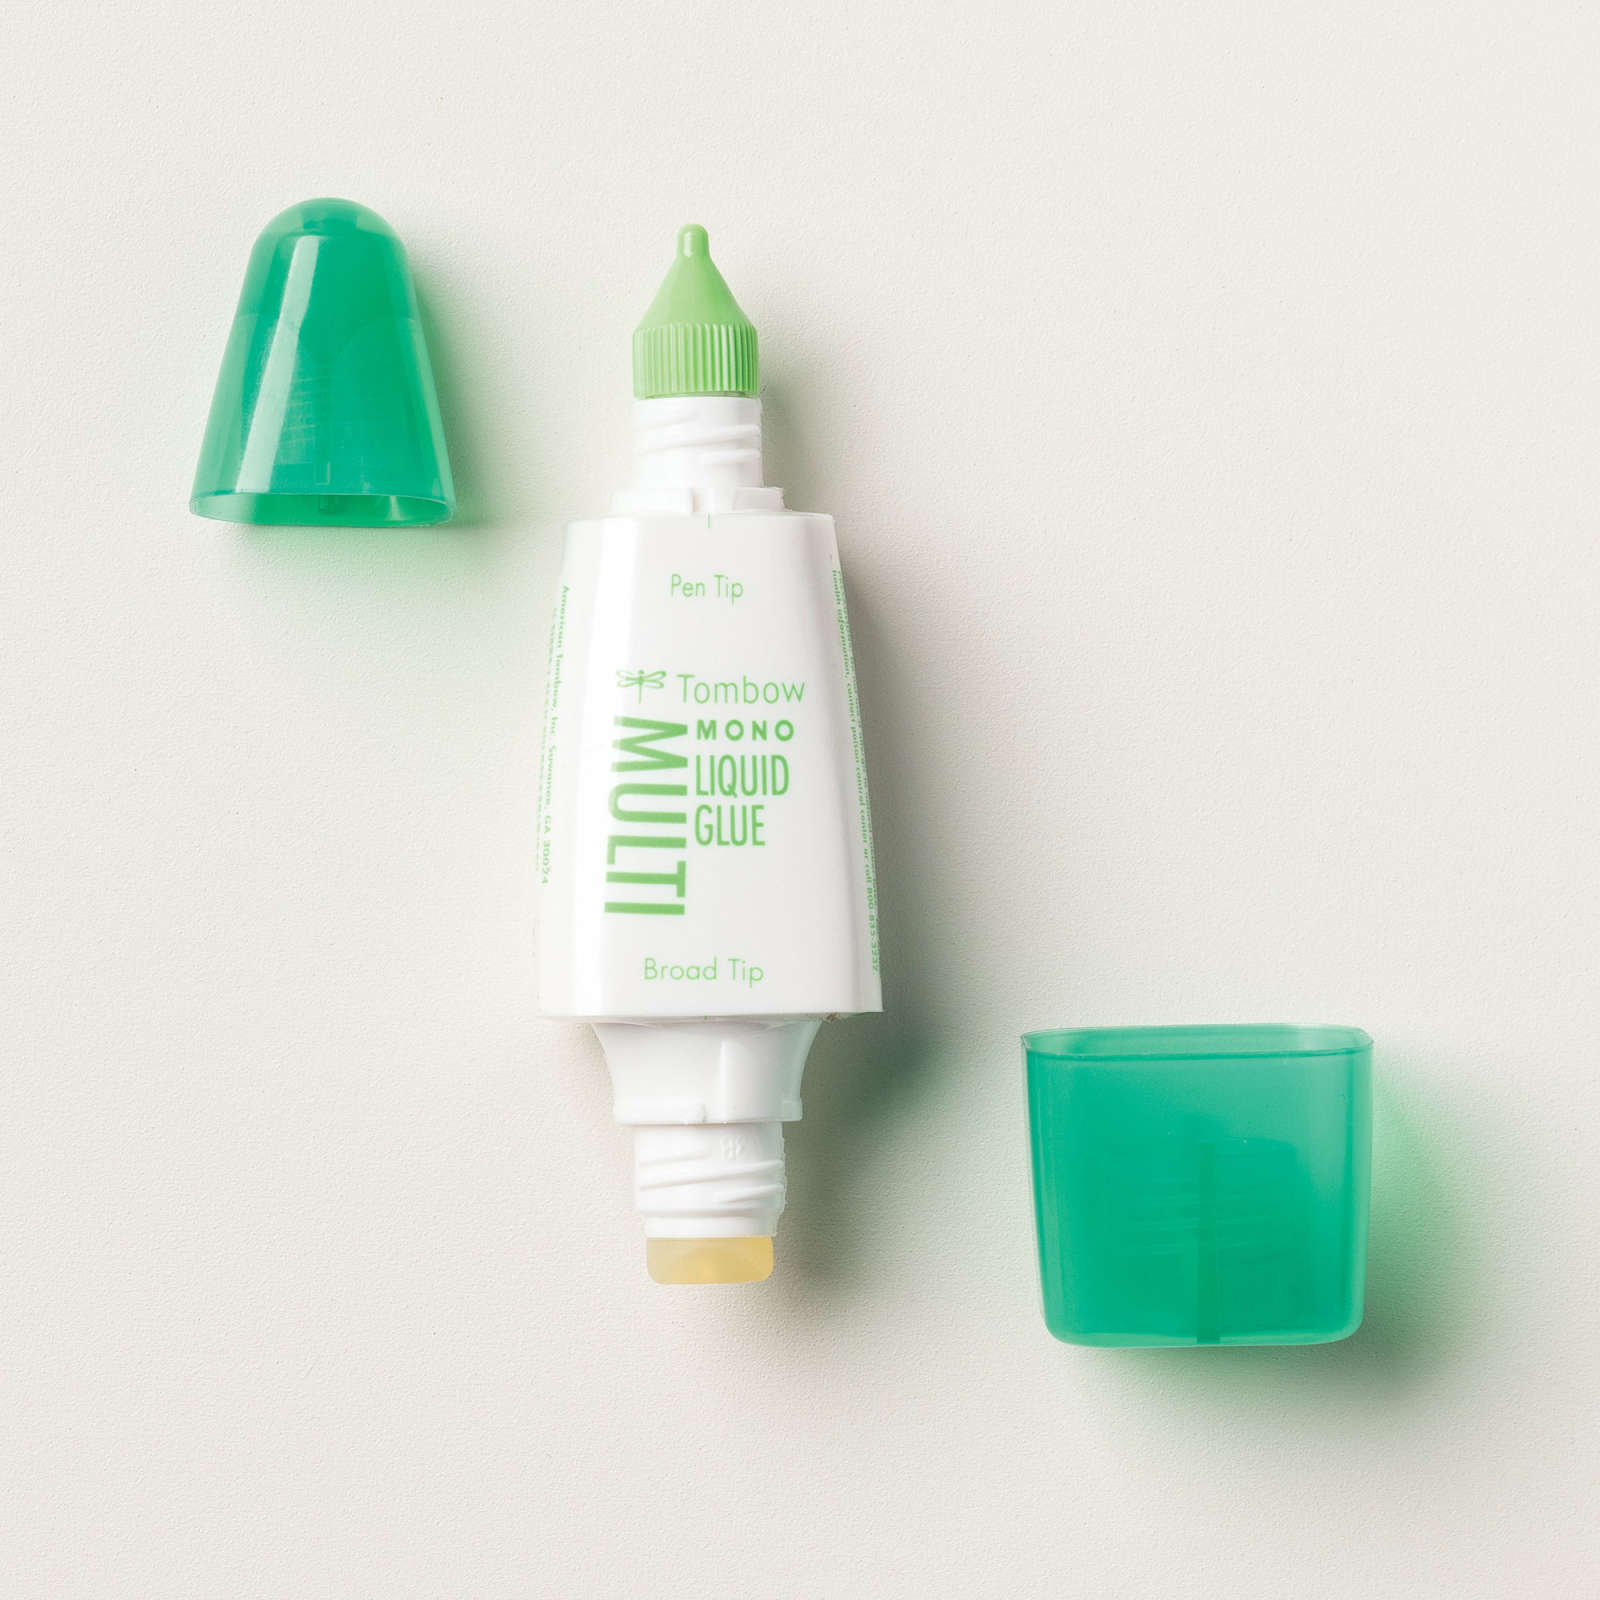
Fold the 1/2" section in & burnish. Apply liquid glue to the folded side then fold the right side of the tube in to meet it.
Gently squeeze the tube & fold in tab 3 of base. Apply liquid glue to the top of this tab & fold in tab 4 over it.
Apply glue to the top of tab 4 & fold in tab 1.
Apply glue to tab 1 & fold in tab 2. Make sure that the base is square.
Stand tube upright & use a long ruler to gently push all of the tabs down to secure the glued areas.
HANDLE & FRONT CLOSURE
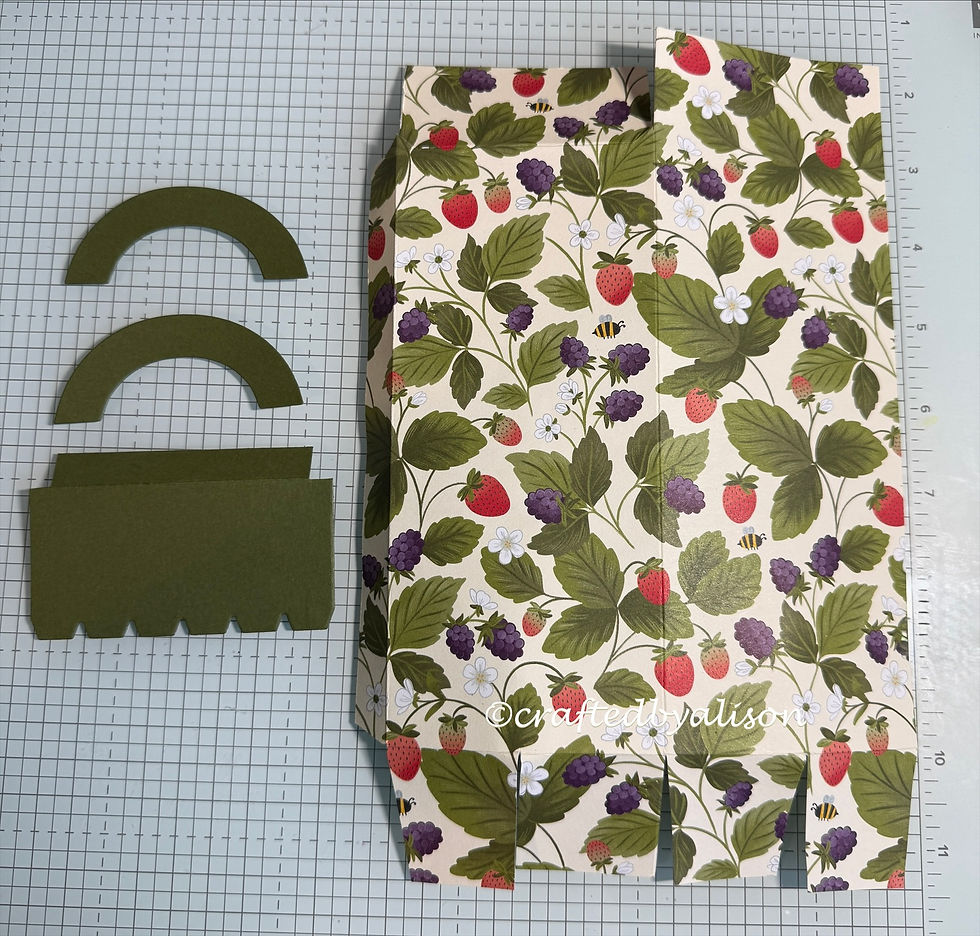
Using Mossy Meadow cardstock I cut the closure section & 2 handle pieces, adhering the handle pieces together. At the same time I also cut a Basic White section for the top of the closure.
On the Basic White I stamped some butterflies in Fresh Freesia from the Bordered in Beauty stamp set & the sentiment from Playful Packaging in Gorgeous Grape before adhering it to the Mossy Meadow closure tab.
The handle was attached to the inside of the tube then the closure tab was added over it. Two small pieces of velcro were added to the front closure then pressed firmly down onto the tube. After allowing a little time for the adhesive to take, I gently levered up the closure with my take your pick tool. This ensures that the two pieces of velcro (male & female) remain on both pieces of paper. You can just see them in the picture below along the serated edge.
The final step was to add two ladybirds to the front from the Ladybug Garden Epoxy shapes. The tube will easily fit a hand cream or a special pen like in the pictures below.


Now for the matchbox.


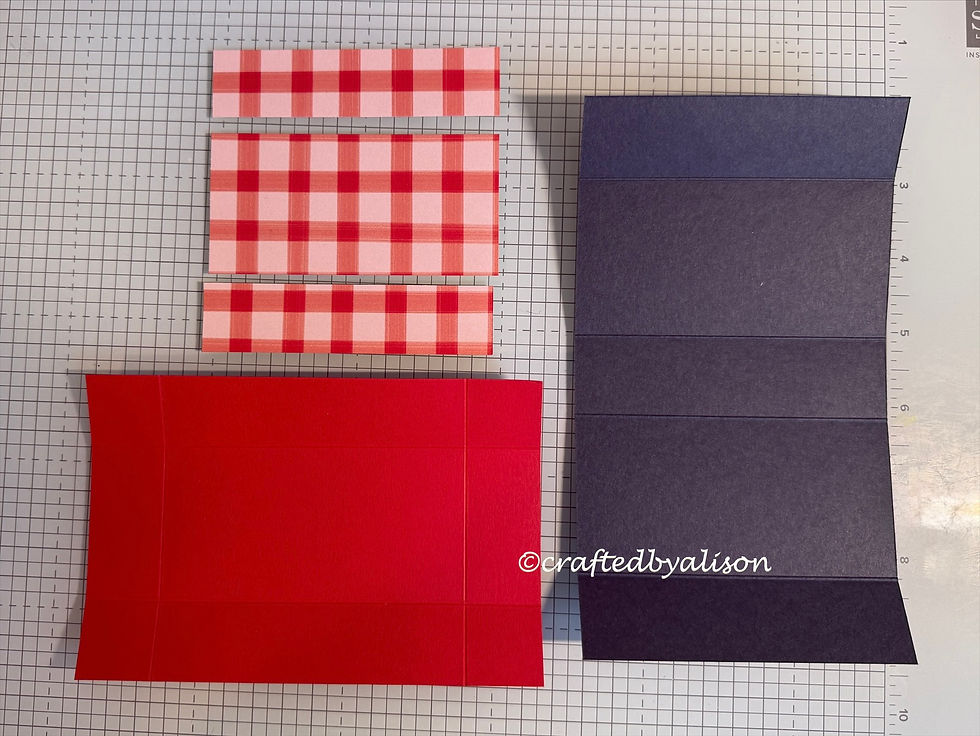
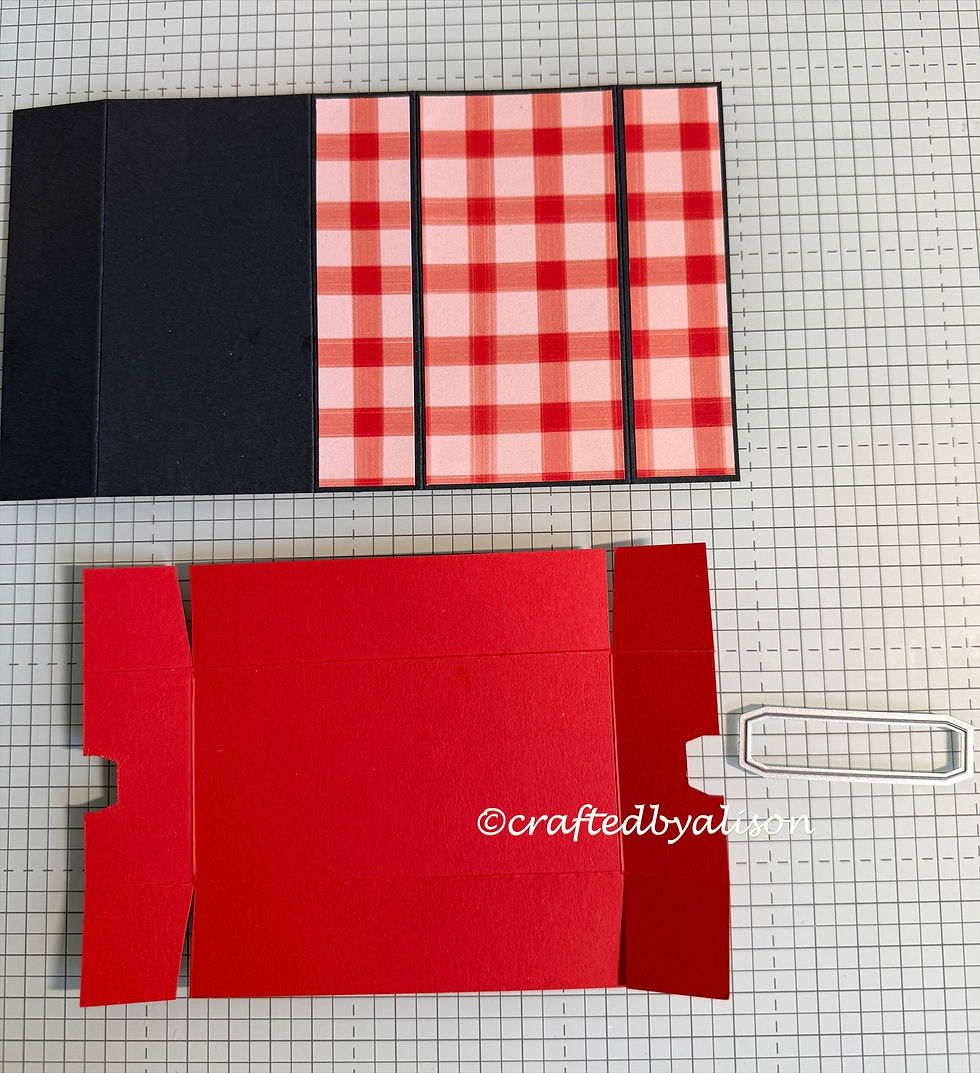
The base is Poppy Parade & the wrap is Secret Sea with Cute as a Bug DSP added.
Starting with a 4" x 6" piece of Poppy Parade I scored at 1" on all sides.
The wrap measures 4 1/4" x 7 5/16" & is scored at 1 1/16", 3 1/8", 4 3/16" & 6 1/4" on the long side.
I chose a check pattern from the DSP pack & cut a piece measuring 3 15/16" x 3 15/16". I then cut a 15/16" strip from each end leaving me with 1 piece of 15/16" x 3 15/16" for the side panel, 1 piece of 1 15/16" x 3 15/16" for the top & another 15/16" x 3 15/16" for the other side panel. If your DSP has a pattern then make sure that you cut it keeping the pattern in the right direction.
There was no cutting needed for the wrap but the base needed to have cuts on the long sides up to the score lines, taking a snippet out as shown in the following picture. All the score lines were burnished for a crisp finish.
I also used one of the label dies from Playful Packaging to make finger holes in the base.
The DSP was adhered to the wrap & you can see in the following picture that the pattern is continuous because of the way it was cut.
To assemble the base & wrap, apply liquid glue to the 4 small tabs of the base, folding them in & holding until the glue sets. Flip the wrap over & apply glue to the small panel (on the left) & then fold the right side over & hold until the glue sets.

The box now slides inside the wrap.

I decorated the top of the box with some fussy cut images I had in my stash & stamped a sentiment from Playful Packaging in Secret Sea on Basic White by masking parts of two stamps to make a new sentiment. This was diecut with the same label die as the finger holes & has a small hole punched for the Linen Thread to be well, thread through! LOL It is popped up with dimensionals.
That's it for my two projects. I hope you've enjoyed seeing how they came together.
So now for some news from Stampin' Up®
Stampin' Up® have many ways of shopping with a physical catalogue, online shopping & in person events. When items are about to be retired or are running low they are put on the 'Last Chance' list which means that there is limited stock & when it runs out, it's gone.
Stampin' Up® 's Annual Catalogue has now retired! Stampin' Up® used to have a large annual catalogue & then release two mini catalogues during the year. As of the 5th May, they have launched a new system of presenting their products & will have 3 catalogues a year but they will all be of similar size. They will still be a similar format - sectioned to have Beginners, which is a step by step collection of materials in kits, then there is Quick & Easy where you select base materials & packs of pre-printed or diecut materials plus some stamp sets then there is Create your way where you choose all the materials, stamps etc yourself & Create Your Way! In the Quick & Easy section Stampin' Up® have also provided some inspiration with a colour wheel & information of various ways to use colour combinations. The other cool feature is that they provide card sketch & scrapbook layout ideas for you. This is great for any times that you need a little inspiration.
If you'd like to browse the catalogue online then click here. If you'd like a copy to hold in your hands, leaf through & put little notes all over it of what's on your wish list then shoot me an email at craftedbyalison@gmail.com or message me on my facebook page at craftedbyalison.
Stampin' Up® also have loads of additional products available only online. These are called Online Exclusives & have no end date, when the stock is sold out, that's the end of it.
Stampin' Up® have a great range of Kits including crafting, card making & gift giving. There are brand new kits added to the collection every month. Click here to check them all out in my online shop. As Stampin' Up® have so many beautiful kits available I feature a different kit in each
Sunday blog so that you can see the range.
This week the feature kit is called Serene Scenes. It's a beautiful stamping kit with peaceful pre stamped images, an ink spot, stamp block & adhesives plus a stamp set & printed envelopes. Enough supplies to make 9 beautiful cards.

Here's how Stampin' Up® describe it...
Have a card ready when an occasion comes up, whether it’s for Father’s Day, a quick congrats, or a simple thank-you. The Serene Scenes Kit includes coordinating card making materials and a stamp set with sentiments for both the inside and outside, making it easy to pull together something heartfelt. Create clean, simple cards that feature inviting watercolour-feel landscape scenes.
If you feel that you need to add this to your list then click here to purchase one from my online store, but be quick as this kit is on the last chance list!
If you shop with me then there are some changes last year to the rewards program that you should know about. In the past we were able to create a host code & group together individual orders & pass on the 'hostess' benefits to customers with qualifying orders. This has now been replaced with a 'Rewards' program that gives all customers who place an order with a qualifying amount a credit of 10% of their order to use on future orders. This will be displayed during the checkout process or your order. Stampin' Up® feel that this is a fairer way of rewarding all customers.
There are some great ways to craft on offer at the moment which I will go through one at a time.
Ready?
1.Stampin' Up® has now held 3 Online Craft Classes with the Traditions of Christmas craftalong & Brushed with Beauty class. The current classes that are available are Lovely Blossoms & the brand new Paper Mixer craft class has just been released. They are both available in my shop by clicking here or on the links above. They are a great way for you to learn from the professionals & a load of fun.
The Paper Mixer class is designed to show you how to mix in the new Paper Medley DSP with other Designer Papers.
Once you purchase any of the Craft Classes you will receive an email with a link to an exclusive Facebook group when the event is hosted. Can't wait to craft along again & see what designs the team come up with!
2. Stampin' Up® held their first ever Virtual Card Making Retreat over two days earlier this year. It was designed for experienced or advanced crafters in mind but also had a heap of tips & ideas for those wanting to explore more detailed card designing. You can still be a part of this event! But be quick as it is on the 'Last Chance' list. To participate you just need to purchase the Retreat kit ($288AU) & this provides you with all of the materials you need & access to an exclusive FaceBook group where the videos from the event are stored. It sounds like a bit of expense but from past experience, what you take away from these type of events is well worth it. You can also download & print the pre event cutting instructions as well as having a cutting video & recordings of all of the cards that were made.
Here's some more info on how to join this retreat.
To craft along with the Stampin' Up® presenters and make 15 beautiful, all-occasion cards, you’ll want to purchase the 2026 Virtual Card Making Retreat kit. Everyone who purchases a kit will receive a link to the exclusive Facebook group where the live event will stream. We only have a limited number of kits, so make sure to order yours ASAP!
3. Starting last December, Stampin' Up® introduced a special 'Product of the Month' item that is only available with eligible purchases. There is a new item every month with details released just before the new item will be released. Each month it's a surprise what it could be - stamps, dies, papers - a complete surprise every month. You will be able to receive each month's product for just $9 when you spend $125 in one order. I have been able to order all of the products so far. December was some lovely blue toned DSP & January was a very versatile stamp set. February was a stunning DSP pack filled with Beautiful water coloured patterns and whimsical designs that make beautiful projects. I featured some creations in one of my midweek post earlier this year. The March Product of the Month was a lovely, whimsical stamp set & April's offering is a gorgeous background die with a pretty eyelet pattern. For May they are offering some Vellum DSP which looks gorgeous. Mine has arrived but I've not had a chance to use it as yet but I can't wait to play around with it!
This will be replaced shortly with the June Product of the Month which is a super cute stamp set. If there is any of the vellum left after the close date you may still be able to purchase it but will need to spend the required amount for each of the Products.
If you would like to add either of these products to your collection, get your shopping list out & place a qualifying order & you will be prompted before checkout to add it to your shopping trolley.
The new May - Aug '26 catalogue is now available & is full of lots of gorgeous new product along with some carry over items. One of the major changes that will be rolled in is that the stamp pads are being changed from fabric pads with a fold out opening to a felt pad & magnetic case. The new pads will be introduced with the new In Colours & more colours will be changed over gradually.
The starter offer finishes today but there will be a new offer soon. Once I have details I will put them in my newsletter & blog post as well as on my FaceBook page. Contact me if you'd like to know more.
Paper Pumpkin! It's officially available to order in the South Pacific after only be available in the North American market. Paper Pumpkin kits are similar to the crafting kits available in the shop but are a surprise each month & come with everything you need to complete the kit. There are also add ons that can be used to stretch the supplies in the kit. Many people also make the suggested projects with half of the supplies then use the remaining products with some extra supplies to create alternative projects.
You can purchase the kits as an individual order or subscribe for 3, 6 or 12 months. Subscriptions are dispatched from the 11th day of each month & you can change or cancel your subscription at any time as long as it is done before the cut off date.

The latest Scrapbook Virtual Retreat has wrapped up. It is called Happiness is Here & has supplies to create 10 double page spreads (20 pages in total) including inks, stamps, papers, gel & shimmer pens, embellishments, flip flaps & page protectors. There are also detailed instructions & recorded videos that you can access for at least a year. To access the videos there is a private FaceBook group that you can access via a QR code when your kit arrives.
If you are interested you can purchase your own kit by clicking on this link.
Lastly, there have been lots of great items added to the clearance rack which is now called Last Chance items so make sure you check them out using this link to my online store as there are some great discounts.
If you would like to purchase any of my creations that I feature in my blogs they can be found in my shop along with lots of different designs including feminine, masculine, special occasions, everyday events, something for the juniors or you can order something unique.
I hope you've enjoyed today's post.
My next post will be on Wednesday & will feature cards made with the May Paper Pumpkin kit.
In next Sunday's post I will be sharing alternative creations with the same kit.
I hope you can join me for both of them & come back for more.
Til next time, take care & keep creating.
XX Alison
Here are some links to the products that I used today & some craft room essentials.
Stamps, Dies, Embossing folders & punches


Cardstock, DSP & paper goods


Inks & Markers


Embellishments

Adhesives


Tools


Comments