
29/4/26 Mid week blog#212 - Exploring the White Wash technique
- Alison Culliver
- Apr 29
- 5 min read

How to use white ink to create beautiful projects.
Hello & welcome to my blog.
My name is Alison & I live in beautiful Melbourne, Australia & I am an independent Stampin' Up® demonstrator.
I love to create beautiful things to share with people that I love but I also sell me creations. I have been creating things in one way or another for most of my life - knitting, sewing, cooking, card making, gardening, scrap booking & hand made gifts & in 2020 after joining Stampin' Up® I decided to share my passion in a blog (craftedbyalison@blogspot.com).
In 2025 I retired & decided to spread my creative wings a little more by combining my blog, products that I had been selling on FaceBook & launching a newsletter. Some of these things I had already been doing but this time they are all in the one place. (All previous posts can be found at my blogspot address above if you would to read any of them.)
And here we are at my new site!
In today's post I am exploring the White Wash technique & adding some colour as well.
The White Wash technique is a fun way to give a ghostly, opaque effect to your colouring. It also can look a little like vellum and it's a fun, easy way to create something different & unique. I hope you enjoy learning how easy it is.
To start with, I selected some colours that the white wash would show up nicely on - it's not going to show very well if you use light or white cardstock.
Here is my first card...

It's such a simple design but is so pretty, perfect for a wedding or engagement.
To create this card I started with a Basic White card base & cut some retired copper Brushed Metallic cardstock for a little shine.
The next layer is Old Olive which I stamped on directly with the large flower & leaf from the Simply Beautiful stamp set, heat embossing it in Copper.

I then got out a water painter, my Whisper White inkpad & a stamp block & inked directly onto the block.
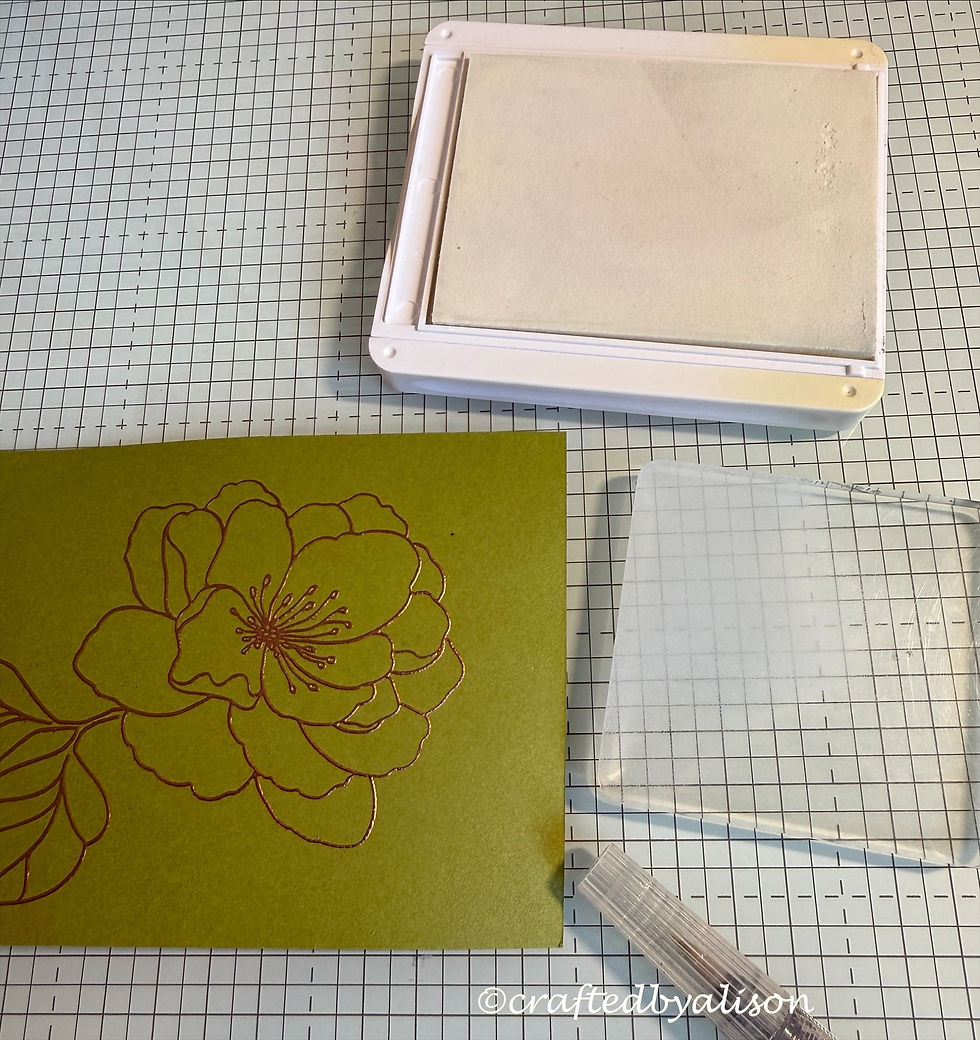
With a little bit of water from the painter I picked up the white ink & painted inside the lines of the flower but I found that the coverage wasn't the shade I liked so I then got my White ink refill out & added a few drops to the stamp block.

Now I had a better coverage & was able to go back over some of the areas to add some depth & shading.
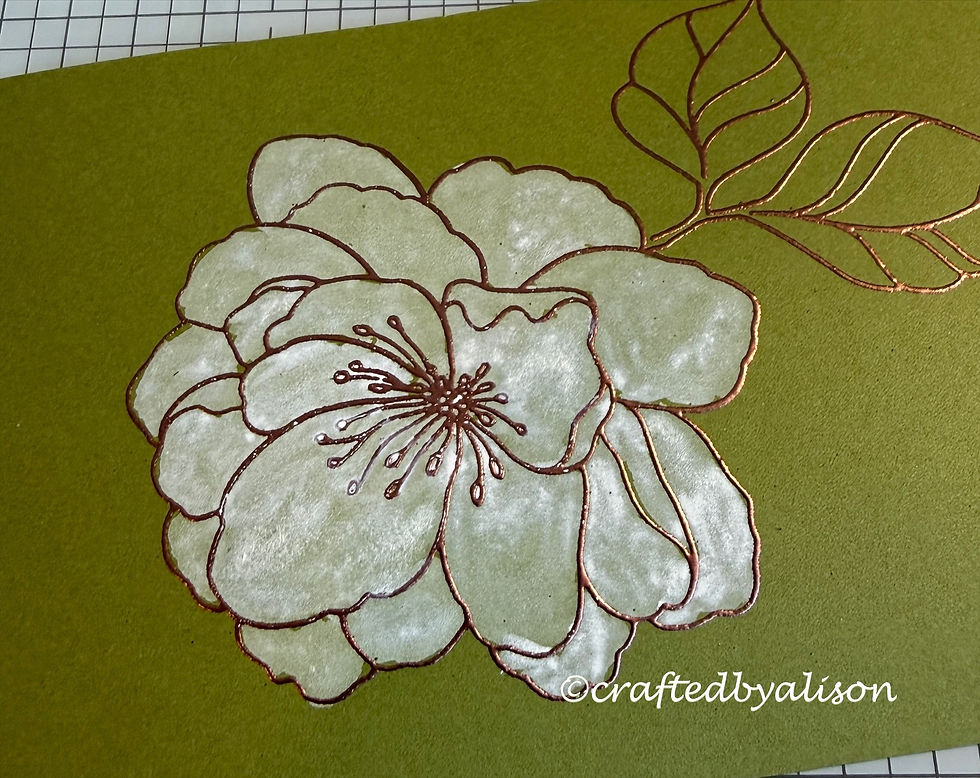
I chose to leave the leaves uncoloured so that the colour of the cardstock would show through. I did however add a little colour to the centre of the flower with a Sponge Dauber & Petal Pink ink for a light blush & more realistic effect.

A white embossed sentiment was then added from the same stamp set.
For a little extra texture I ran the blade of my scissors around the edges of the cardstock for a distressed finish then added a touch of white with a new White Gel Pen that will be available from the upcoming May - Aug '26 catalogue.
I added this layer to the base.
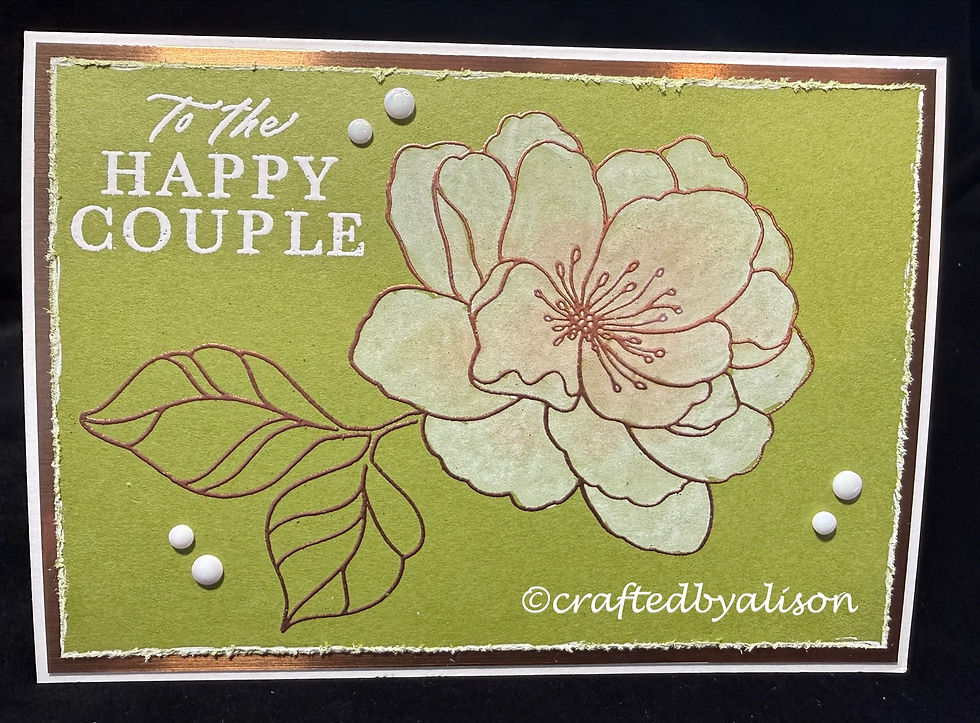
The finishing touch was to add some white Pearls of Beauty for a little elegance & stamp a matching envelope using (retired) Copper Clay which looks like embossed copper when stamped.
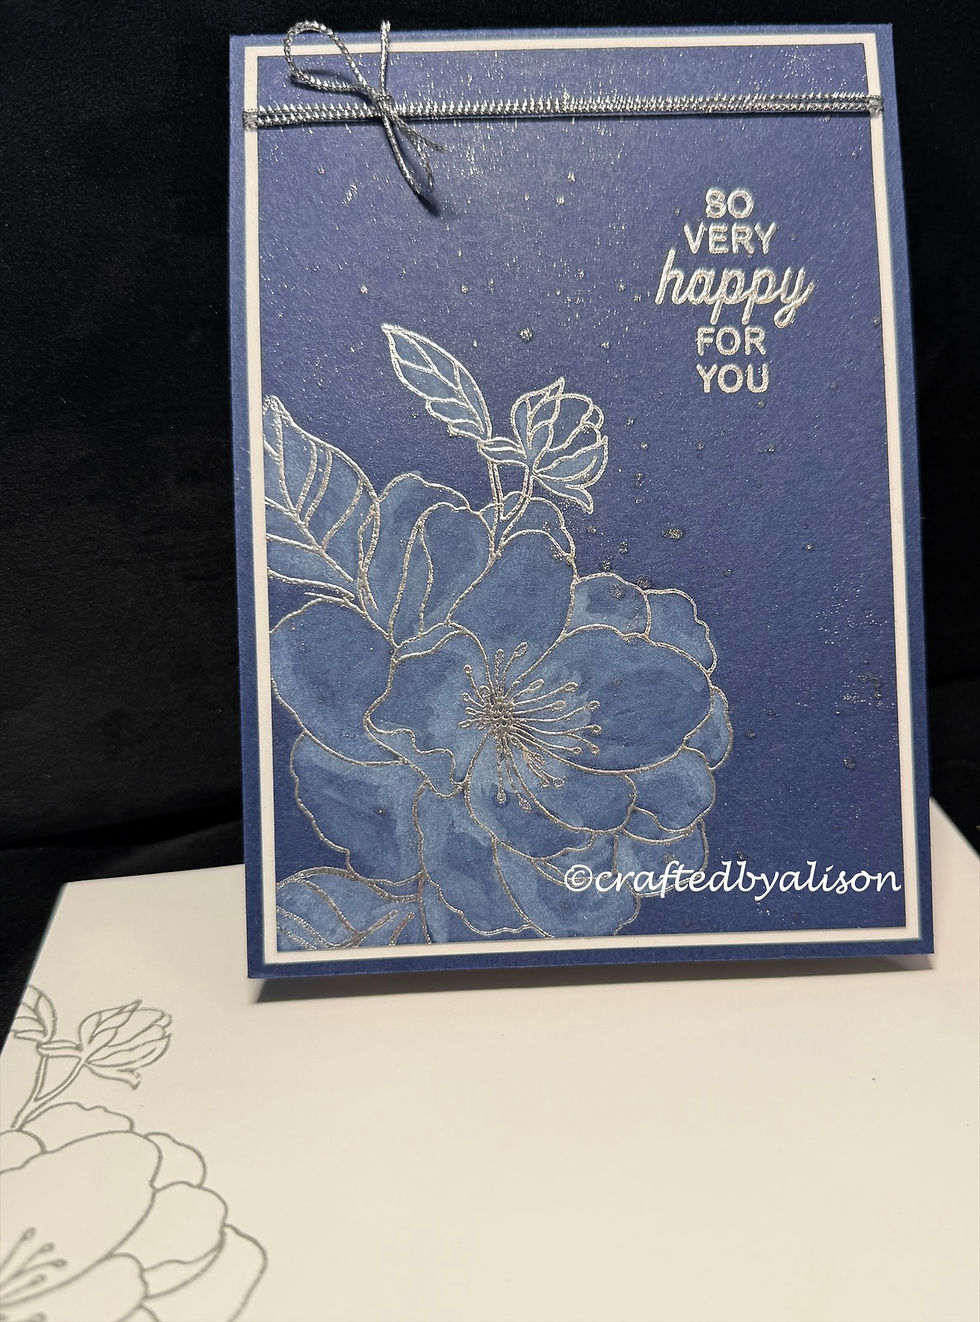
So then I decided to show how the White Wash technique would look on a darker background & selected Night of Navy for my base & matte with a Basic White matte between the two. This time the orientation is portrait rather than landscape.
On the Night of Navy matte I stamped the same large flower in the bottom left corner to allow for a sentiment in the top right corner & some twine which will be added in a further step, but added a smaller bud & just one leaf this time. I also chose to emboss it in Silver instead of Copper.
I followed the same colouring technique but added a little more shading detail. The effect with the darker background is less white & more of a soft blue.

Before adding this to the base & Basic White matte I added a silver embossed sentiment from the Scalloped Wishes stamp set & allowed some of the embossing powder to sprinkle over the card for a starlight effect. I also wrapped some (retired) silver Simply Elegant trim around the top & added a bow.
It was lovely but I wanted just a little more sparkle so I flicked some Wink of Stella over the front as well.
Now it was ready to be added to the card front.

Here's a closeup of the 'sparkle'...

and one of the card with a matching envelope which has the image stamped in Smoky Slate...
I think it is quite elegant, another card suitable for a wedding. My daughter thought so as well & promptly snapped it up for a wedding next week! LOL
That's it for this post. I hope you've enjoyed this technique. Perhaps you'll even try it yourself? Please feel free to pop a photo of your creation on my FB page at craftedbyalison if you do create something, I'd love to see what you make.
My next post will be on Sunday where I will share some great masculine themed cards made with the Gears & Textures stamps & dies.
Next week's mid week post will feature cards created with the new April Paper Pumpkin kit called Lakeside Retreat & which co-ordinates beautifully with the Waterside Retreat suite that will be in the new catalogue that launches next week on the 5th May! Exciting!
I hope you can join me for both of them.
I have included some links below for products that were used in today's project as well as some craft room essentials.
Til next time, take care & keep creating. XX Alison
Stamps, Dies, Embossing folders & punches
Cardstock, DSP & paper goods
Inks & Markers
White gel pen will be available in the upcoming May - Aug '26 catalogue
Embellishments
Adhesives
Tools


Comments