
23/8/26 August Paper Pumpkin kit - Kindred Greetings

Explore the beauty of simple designs & soft colours with 3 compassionate cards.
Hello & welcome to my blog. I hope you are all well.
My name is Alison & I live in beautiful Melbourne, Australia & I am an independent Stampin' Up!® demonstrator.
I love to create beautiful things to share with people that I love but I also sell my creations. I have been creating things in one way or another for most of my life - knitting, sewing, cooking, card making, gardening, scrap booking & hand made gifts & in 2020 after joining Stampin' Up® I decided to share my passion in a blog (craftedbyalison@blogspot.com).
In 2025 I retired & decided to spread my creative wings a little more by combining my blog, products that I had been selling on FaceBook & launching a newsletter. Some of these things I had already been doing but this time they are all in the one place. (All previous posts can be found at my blogspot address above if you would like to read any of them.)
Every month I receive the latest Paper Pumpkin kit from Stampin' Up!® & create the cards as per the instructions in the kit then in a different post I create alternative designs. This month's kit has 3 lovely, easy to create cards with soft muted colours with thoughtful sentiments for those occasions when you need to send love or hugs to someone.
This is what the kit looks like when you open it up...

and how it looks when you unpack the supplies...
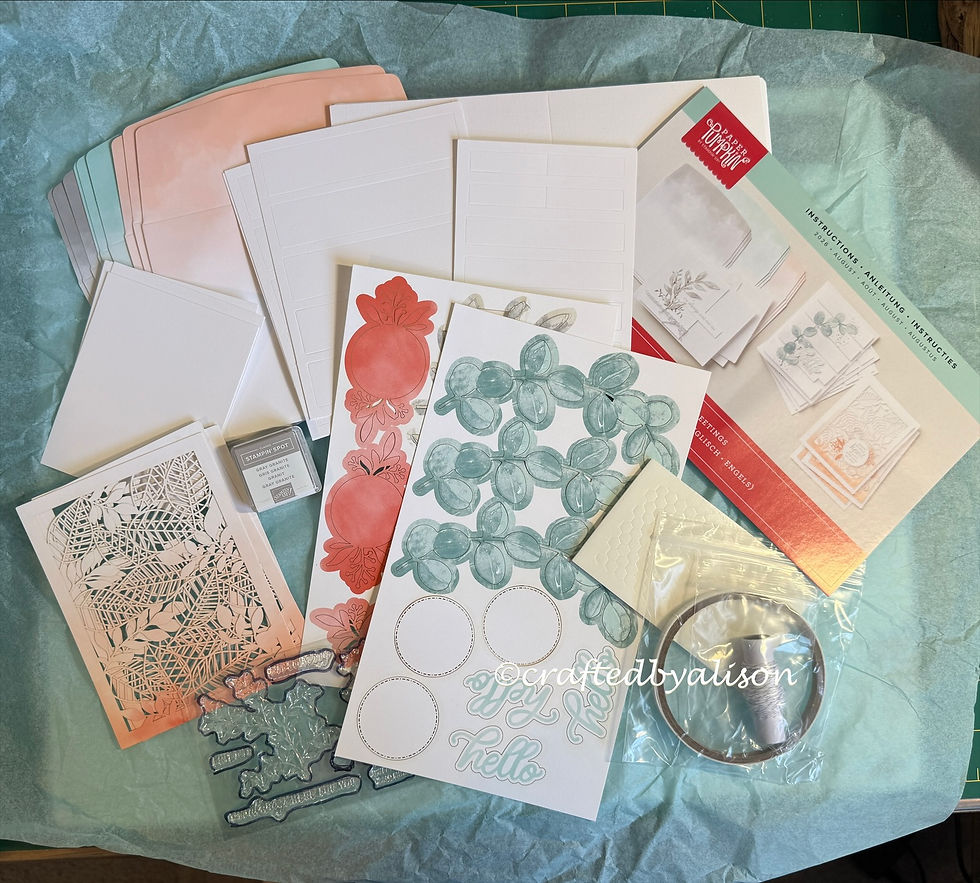
In the bright red box you receive card bases, printed envelopes, pre-printed & pre-cut images & shapes plus a stamp set, ink spot, adhesives & twine.
Following the instructions here are what you create...

This set is a beautiful collection of cards that are easy to put together with gentle sentiments for difficult moments.
CARD 1.

This beauty was the easiest to put together. In the kit there is a sheet of 5 banners , ready to pop out. I stamped the spotty design in Gray Granite & added them to the card base with dimensionals before separating them from the surrounding sheet. This way I was able to have them perfectly aligned without stressing over the placement! Good cheat hack there! LOL
The leaves are adhered with liquid glue & the two sentiments were added with dimensionals, the smaller one fitting inside the gap of two panels.
That is how the card is finished in the instructions but I added a few of the Pool Party coloured Moody Palette Glossy dots.

CARD 2.

I love the intricate design of this card. The ombre effect is pre-coloured & the cut out design is all ready to attach to your base - no picking out of the little diecut pieces. Love it!
This card is created following the instructions but I did add some Timid Tiger 2025-27 In Colour Flat Pearls to finish it.

CARD 3.

An elegant monochrome design, this features Gray Granite & Basic White with some of the same pearls as Card 2 but in Cloud Cover which is so soft that it looks almost grey. Super simple.

Well, that's it for this post. I hope you enjoyed seeing this month's Paper Pumpkin cards.
Next week's mid week post will feature a funfold - one of my favourite ways to create.
If you would like to subscribe to receive Paper Pumpkin kits yourself - either as a one off or for 3, 6 or 12 months then click here & you'll go directly to my shop.
Next week's Sunday post will feature alternatives for this Paper Pumpkin kit. I'm looking forward to playing around with the rest of the supplies in the box.
Thanks for visiting, I hope you can join me for my next posts.
Til next time, take care & keep creating.
XX Alison


Comments