
11/3 - More fun with the Star funfold design
- Alison Culliver
- Mar 11
- 5 min read

An easy funfold that looks like you worked hard on it!
Hello & welcome to my mid week blog.
My name is Alison & I live in beautiful Melbourne, Australia & I am an independent Stampin' Up® demonstrator.
I love to create beautiful things to share with people that I love but I also sell me creations. I have been creating things in one way or another for most of my life - knitting, sewing, cooking, card making, gardening, scrap booking & hand made gifts & in 2020 after joining Stampin' Up® I decided to share my passion in a blog (craftedbyalison@blogspot.com).
In 2025 I retired & decided to spread my creative wings a little more by combining my blog, products that I had been selling on FaceBook & launching a newsletter. Some of these things I had already been doing but this time they are all in the one place. (All previous posts can be found at my blogspot address above if you would to read any of them.)
And here we are at my new site!
For those of you who have already visited my blog, you would already know that one of the things I love to play around with are funfolds.
Funfolds are regular cards that have been folded or had some pieces added to alter it and change it from 'nice' to 'WOW'. That's what I have for you today.
The fold I have created has been around for a little while but it's new to me & is called a Star fold. When you stand the card up, there are 6 tall boxes, adhered together to form a star shape. Best of all, it folds flat to fit in an envelope! It does need a slightly larger envelope than a regular one, I used a 16cm x 16cm square envelope, but it still folds flat for posting.
As there are a few steps to this funfold &, if you're like me & prefer to see how something works, I have taken loads of photos of the steps to help you navigate & understand them all.
The measurements are all in inches instead of cms as the instructions I learnt this fold from are in inches & it's easier to create in inches rather than cms.
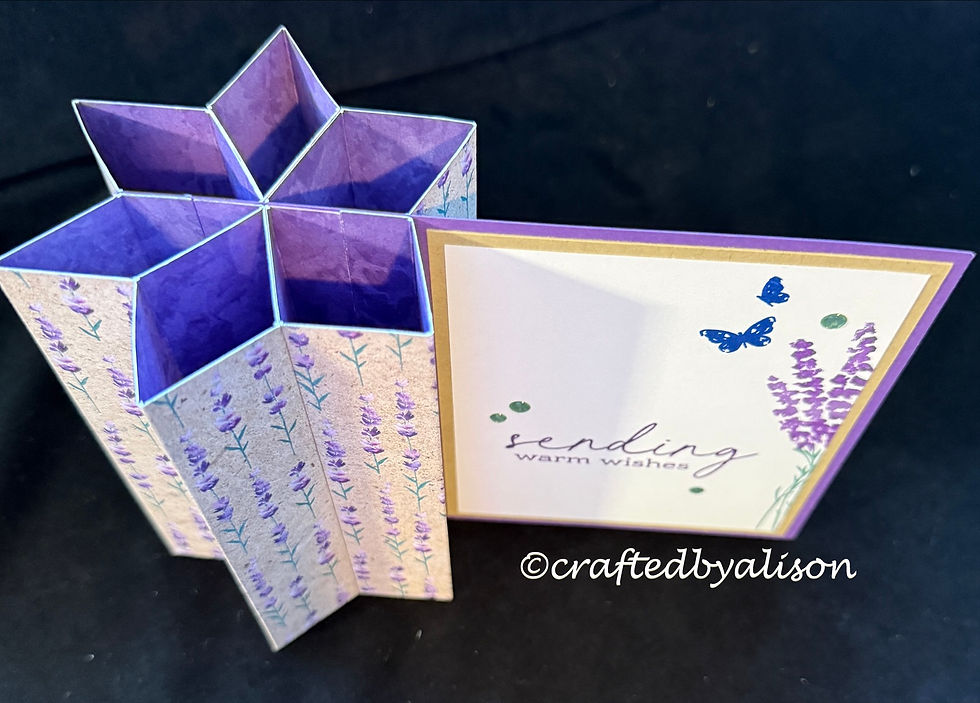
Here's what I created...
So let's start with the supplies I used.
Gorgeous Grape cardstock measuring 5" x 6"
2 x Crumb Cake mattes measuring 4 3/4" x 5 3/4"
2 x Basic White mattes measuring 4 1/2" x 5 1/2"
6 x Perennial Lavender DSP pieces measuring 5" x 4"
Painted Lavender stamps & dies (retired)
Notes & Totes stamps
Gorgeous Grape, Highland Heather, Lost Lagoon & Blueberry Bushel inkpads
Glossy Dots assortment (retired)

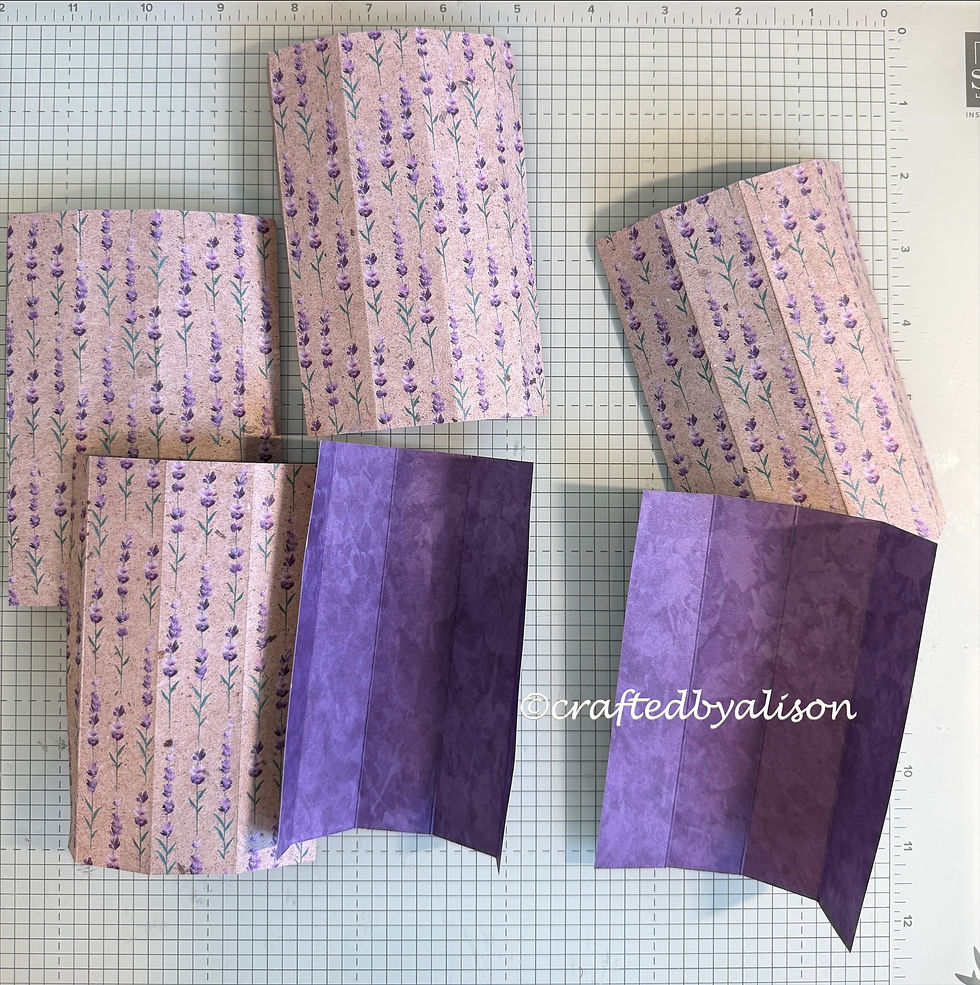
Starting with 4 pieces of DSP, score at 1/2", 1 1/2", 2 1/2" & 3 1/2" along the 4" side.

Score the remaining 2 pieces at 1", 2" & 3" on the 4" side.

Fold & burnish all score lines.
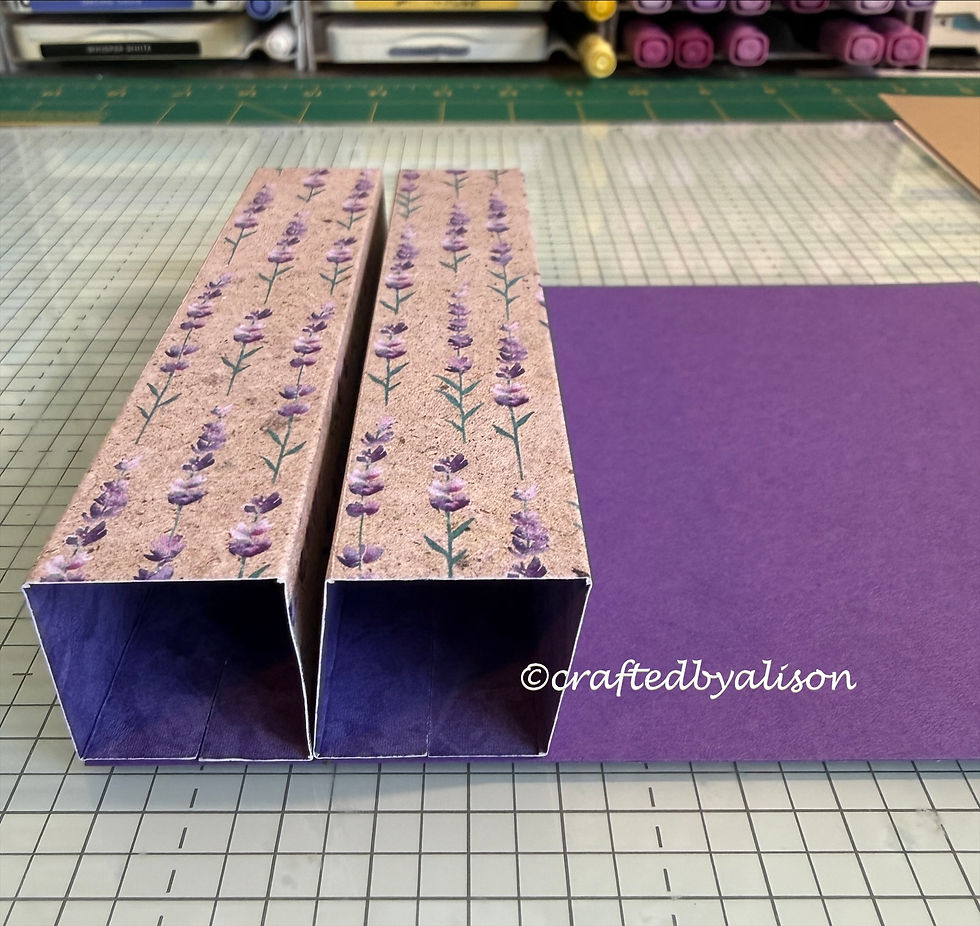
With the pattern facing up, apply liquid glue to the 1/2" section on the left hand side of one of the DSP pieces you scored with 4 score lines.

Align it with the left edge of the base. Make sure it is butted up flush with the edge.
Fold the DSP flat & apply liquid glue to the 1/2" section on the right hand side & butt it up against the glued section so that you now have a square.

Take the next piece & repeat the process, applying glue to the 1/2" section & butt it up against the 1st square, apply glue to the second 1/2" section & create a second square.
Flip the card over & repeat the process with the remaining 2 pieces that have the 4 score lines, this time using the right side edge as your guide.


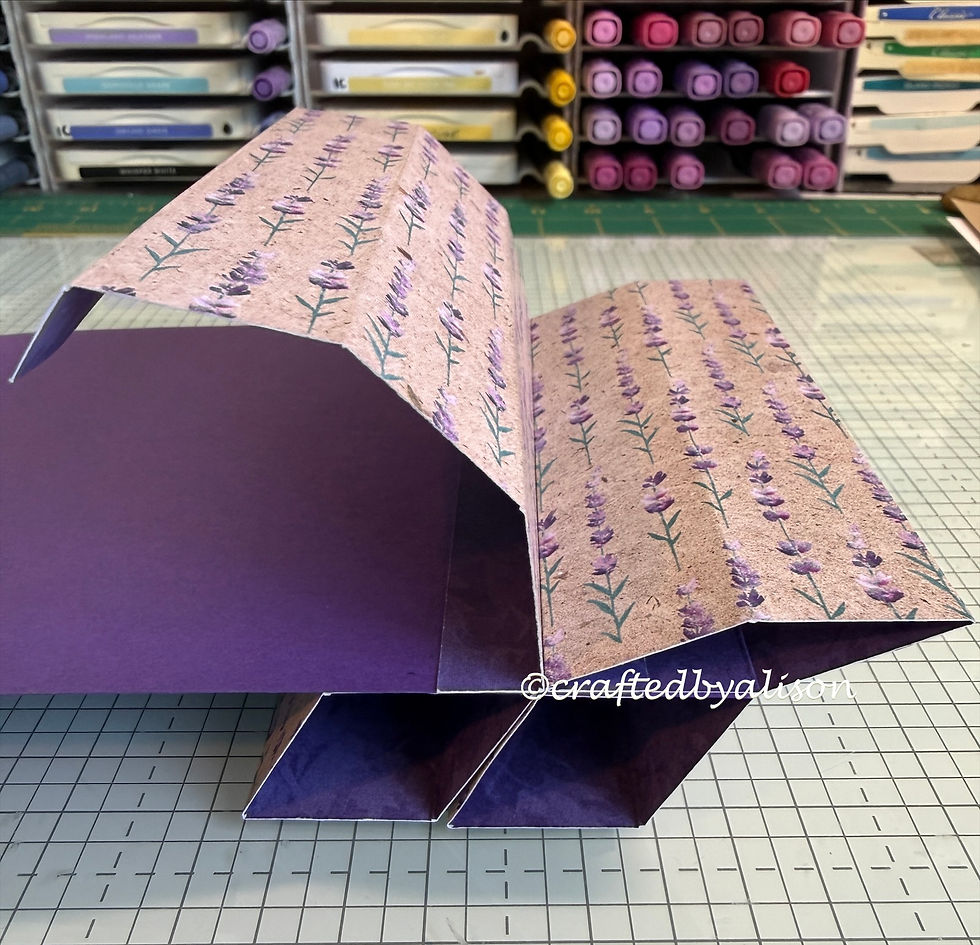

Ok, now to add the final two pieces & create the star shape.
Flip the card back to the starting position & apply glue to the left panel of one of the final pieces. Adhere it to the right hand side of the very first square you created.

Apply glue to the right side of this panel & adhere to the left of the second square.


Flip the card again & repeat with the final piece. You now have your star.

I then placed both pieces of Basic White onto some scratch paper & lightly taped them with some washi tape & stamped a lavender bouquet from the Painted Lavender stamp set so that it appeared on half of both pieces. A sentiment from Notes & Totes was added to one for the front & some cute little butterflies from Painted Lavender were added to both pieces.

Separated, they were adhered to the Crumb Cake mattes & adhered to the front & back of the card.

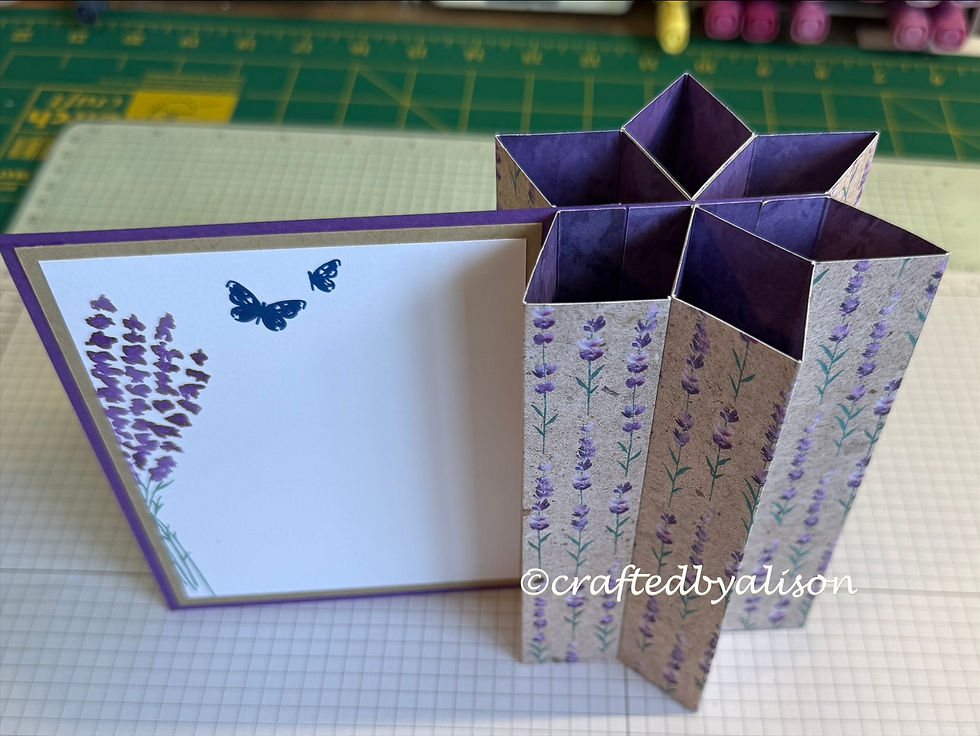
If you fold the star flat it will now fit in a 16cm square envelope.

Here are some pics of the finished card with some Glossy dots added.

As this was a new funfold for me, I created a prototype with retired products & here is the first one I created.
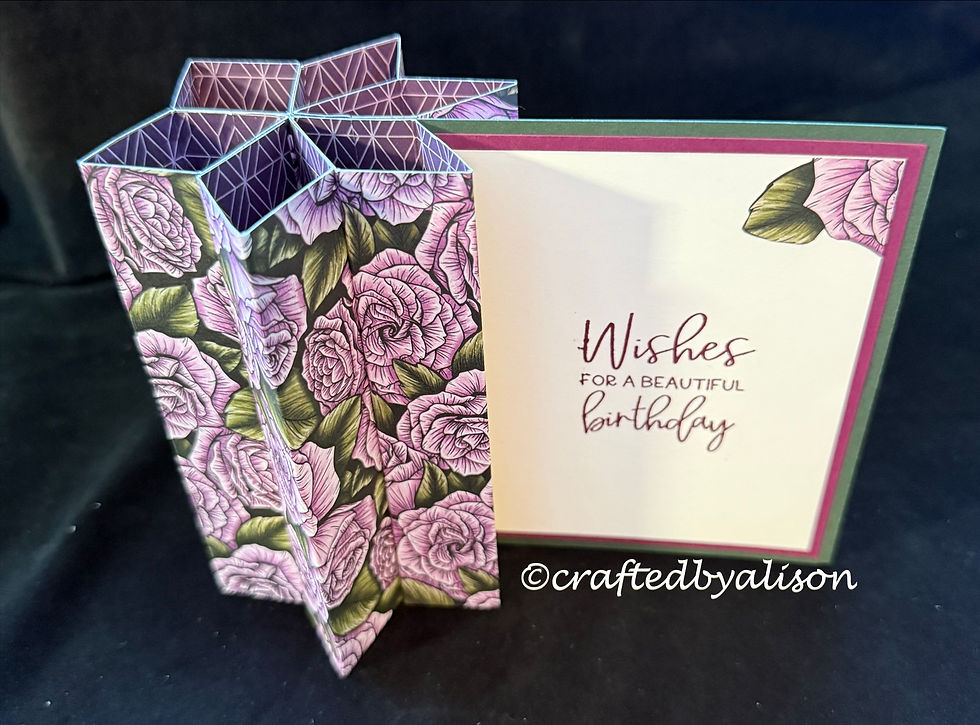
I love this fold, it's not too hard & certainly has a WOW element.
That's it for this post. I'll provide some links below to products I used to create this card.
My next post will be Sunday, after I'm back from Sydney & I have to be honest, all of the work has already been done & the post is scheduled to go while I'm still flying back. It is a Mystery Stamping adventure.
My next mid week post will take you through all of the ways you can use a clever little tool called Take Your Pick.
Now, I'm off to finish getting ready for my trip to Sydney tomorrow! I can't wait to share my experience with you. This is my first time at the in person event, the only other one I've attended was online due to COVID.
Til next time, take care & keep creating.
XX Alison
Stamps, Dies, Embossing folders & punches
Cardstock, DSP & paper goods
Inks & Markers
Embellishments
No current embellishments use this week
Adhesives
Tools


Comments